“Begin doing what you want to do now. We are not living in eternity. We have only this moment, sparkling like a star in our hand - and melting like a snowflake.”
- Francis Bacon

Saturday, October 03, 2009

Kittens and rosebuds and blankies, oh my! Must be Pink Saturday!


What you see above is just a little milk glass trinket box with a hand painted rose that is in the master bath. Generally it will hold my earrings and those darned itsy, bitsy, teeny, tiny backs that so easily get lost!

Just like everyone else, I am wondering where the week went. Heck, I'm wondering where the summer went! The summer? Where did September go? Anyway, here we are again at Pink Saturday hosted by the gracious Beverly at HOW SWEET THE SOUND. There are oodles of pinkies participating this week so be sure to take a peek at them all.
 
This blanket sits at the foot of my bed. I snuggle into this sweet gem on cool summer evenings. Just about time to pack this away and to bring out something more heavy duty. The evenings are really getting cold!
 
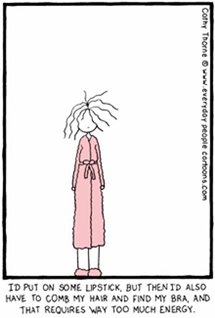
I just adore this vintage figurine. I love the color and the design and the sentiment, too, because all of us at one time or another feel just like this little kitten and need someone to give us a hug.
 
Pulling up the rear this week is Miss Camille Suzanne. She reminded me as I was getting together this blog post that there was a photo of her on my laptop of her modeling her pink nose and pinkie velvet ears. She's not vain - nope, not one bit☺

Now on to my feature blog this week. I picked SWEET NOTHINGS! You will not meet a sweeter or more darling hostess than bj. She always has something kind to say and she always has something pretty to see and you always leave her blog feeling better than you did a few minutes before. And there are a couple of other reasons:


This dog! If anyone knows me at all they know that my heart belongs to animals and that a dog can wrap me around it's paws faster than it can wag it's tail. And - my mom died as a result of her breast cancer metastasizing in her bones and liver. My mammogram will take place at the end of this month. How about yours?


Lastly, I just LOVE the way she presents things and the fact that her blog isn't stale. What I mean is that she doesn't keep spewing out the same old stuff over and over. It is fresh and new and I'm sold! I think you will be too!

Friday, October 02, 2009

♥Can't Eat Just One Ghoulish Eyeball♥


Click on photo to print
These scary-good Halloween treats, prepared and eaten on the same fork, begin with a doughnut hole dunked in white chocolate. Little kids and big kids will be wanting more of these cutie pies! This recipe is for a dozen but I've always had more ingredients on hand, especially if I have warm cider or hot cocoa to serve as a chaser. Even the real little guys can make one of these and when they do, you should see the delight in their eyes! The real ones!

INGREDIENTS:

2 (11-ounce) bags white chocolate chips
12 doughnut holes
Semisweet chocolate chips
Tube of red decorator frosting

1. To coat a dozen doughnut holes, melt the white chocolate chips over low heat (and keep the chocolate warm while you work). With a fork, spear each doughnut hole and submerge it in the melted chocolate to coat it, then gently tap off any excess.

2. Stick a semisweet chocolate chip with its point cut off onto each doughnut hole, cut end first. Place the forks (handle side down) in a mug and allow the chocolate coating to harden.

3. Use a tube of red decorator frosting to add squiggly veins radiating out from the pupils.

Wednesday, September 30, 2009

Quick as a Bunny Spooky Ghost Cookies


Ingredients
  • * 1 pound white candy coating, coarsely chopped
  • * 1 package (1 pound) Nutter Butter peanut butter cookies (store brand, if you can find them work just as well)
  • * miniature semisweet chocolate chips 
Directions
In a microwave-safe bowl, melt candy coating, stirring occasionally. Dip cookies into coating, covering completely. I found the easiest way to coat the cookies is to stick a toothpick into the filling and dip it using that. Not so much on the fingers that way and no tell-tale signs on the cookies where you had to patch the coating. Place on waxed paper.

While coating is still warm, place two chips on each cookie for eyes. Let stand until set. Store in an airtight container. Yield: about 3 dozen.

Tuesday, September 29, 2009

Acorns and pine cone napkin rings - sit down with the kids and have some fun!


Squirrels aren't the only ones who can tap an oak tree's potential. For pretty napkin ties that evoke the harvest season, attach acorns or pine cones to a little raffia and you have a sweet table accessory that your guests can take home. For an added special touch, take plain business cards, letter the name of each guest on a card, punch a hole in a corner and thread through the raffia along with the acorns or cones! Use your imagination - let it run wild!


Napkin Ties How-To

1. If the acorns aren't precut (finding your own with a couple of children in tow is more fun), separate the cap from the body of each acorn with a craft knife.
2. Make a small hole in cap with an awl. Thread your raffia through a cap; knot at top.

3. Thread through another cap; knot on both sides. Reattach bodies.

The same idea can be used for pine cones for Christmas, sea shells for a summer BBQ - have the kids put on their thinking caps. I just bet they can come up with dozens of natural goodies to use! Nothing natural? How about three buttons threaded through the raffia?

Sunday, September 27, 2009

All that glitters isn't gold or Cinderella didn't have anything over on the PUMPKIN!


Create a centerpiece for Halloween festivities that your guests will talk about and be able to talk over! A beautifully laid out dinner party may seem like quite the undertaking, but remember all Cinderella needed to begin her transformation was a pumpkin! So start with a pumpkin as your centerpiece and its beauty will carry you through the rest! This gorgeous pumpkin is easy to make beforehand and will be more exquisite (and not to mention more affordable!) than any purchased centerpiece from your favorite florist.


Select a pumpkin that will fit the table you will be serving from if a buffet or sitting at if a sit-down occasion.

Picking the right size is a large factor in successful presentation. A small pumpkin may be drowned and disappear amongst the food. A large pumpkin will have a great affect, but may be impractical for a crowded table.You can always select three smaller fella's - one large and two small - for more fun and creativity when you are crafting them.

Use a sponge brush to lightly paste the whole pumpkin while it sits on waxed paper. Quickly sprinkle your favorite glitter (we love Martha Stewart’s powder glitter in penny, persimmon, orange, and pink champagne!) onto the pumpkin. Allow to dry and brush off the excess.


For the fourth and final step, tie a big bow with long draping ends cut on diagonal. For a more formal style, we prefer a rich autumn satin bow. If you are having an informal buffet, choose a plaid or polka dot ribbon tying knots up the stem rather than a bow.