“Begin doing what you want to do now. We are not living in eternity. We have only this moment, sparkling like a star in our hand - and melting like a snowflake.”
- Francis Bacon

Saturday, January 23, 2010

Pink Saturday Girlie Stuff + ♥Almost homemade Black Forrest Cupcakes for your Valentine♥

Another Pink Saturday has rolled around that needs some PINK attention.This week I am sharing a girlie-girlie post with you. Guess I'm in the mood for spring even though it's still very cold outside and we still have a bundle of snow on the ground and can't see any grass This is my cheer-me-up post. My cuddly, sweet and happy post that will warm me up and help me to realize that spring will come sooner or later and that winter will be just a memory

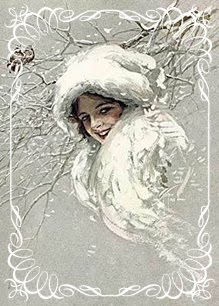
The photo above is cute but the little marabou feather and pink satin ribbon fairy laurel is much sweeter when you can touch those floofy feathers and feel the whipped cream surface of the ribbons. This little goodie will be sent to my grand-daughter for Valentine's Day, along with some other items, to make her day special. Rachel loves to play dress-up and truly believes she is a little princess (three brothers + three male cousins help her with that impression of herself), so I like to reinforce her knowing that she is my little lady.


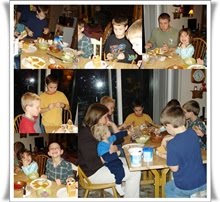
For a little smile, I'm including a PhotoShopped image of my Miss Camille Suzanne. Being a fussy, little gal, her Saturday night bubble bath is a must if she is going to keep her white furs all soft, silky and touchable! This photo was featured on my kitty blog along with others when she was getting ready for a night on the town with her suitor, Dante. (We sure have a lot of fantasy fun over there☺.)


I just love these guest soaps. To wash your hands or face you peel a petal off the pink rosebud, hold it under water and there you go - luxurious, scented bubbles just for you! When done, just toss the petal into your waste basket. I bought several of these from a local artisan because I love pink and I love roses and I love to share and give gifts. In fact, I bought so many I am offering a couple of them for sale on my Etsy pages. I just ♥ feeling like a girl

Last, but certainly not least, is my PINK recipe of the week for you. This one is so simple and easy - perfect for whipping up for your little one to take to school or Sunday Bible studies or for you to bake at a moment's notice to take to work or share with neighbors. Moist and cute as a button - what more could you want!

♥Almost homemade Black Forrest Cupcakes for your Valentine♥

Ingredients

* 1 (18.25-ounce) box devil's food cake mix
* 1 1/3 cups black cherry soda
* 1/2 cup vegetable oil
* 3 eggs
* 1 container vanilla frosting
* 2 teaspoons cherry extract
* 1 to 2 drops pink food coloring
* 24 whole maraschino cherries with stems

Directions


Preheat oven to 350 degrees. Line two (12-cup) muffin tins with paper liners.

In a large bowl combine cake mix, soda, vegetable oil and eggs. Using a hand mixer combine all ingredients, batter will still be somewhat lumpy. Pour batter into muffin cups. Bake 19 to 22 minutes, turning the pans halfway through baking. Remove to a rack and allow to cool completely.

In a large bowl combine frosting, extract and pink food coloring. When cupcakes are cool ice with pink cherry frosting and top each with maraschino cherry.

Be sure to stop by Beverly's HOW SWEET THE SOUND to check out all of the wonderful blogs that participate in PINK SATURDAY. If you ♥ pink it's the place to be today! 

A WORD ABOUT REDUNDANT OVERKILL! There are so many participants on Pink Saturday that asking us to enter codes only to find out that you are going to moderate the comment as well is OVERKILL. Please do one or the other. Doing both serves no purpose and causes people to leave your blog frustrated about the hoops they had to jump through. I visit each and every blog - it is frustrating to say the least. 

One good way to speed the process for all of us on Pink Saturday would be to remove all barriers to comments for the day only. Wouldn't that be nice?

Thursday, January 21, 2010

Comforting bean and cabbage soup (grab the Bean-o☺)


More than just bean soup. More than just cabbage soup. This soup will stick to your ribs, warm you up and make you feel good from the inside out.

1 tablespoon extra virgin olive oil
a big pinch of sea salt
1/2 pound potatoes, skin on, cut 1/4-inch pieces
4 cloves garlic, chopped
1/2 large yellow onion, thinly sliced
5 cups stock. Make with vegetable bouillon for ease of preparation.
1 1/2 cups white beans, precooked or canned (drained, rinsed well)
1/2 medium cabbage, cored and sliced into 1/4-inch ribbons
more good-quality extra-virgin olive oil for drizzling
1/2 cup Parmesan cheese, freshly grated

Warm the olive oil in a large thick-bottomed pot over medium-high heat. Stir in the salt and potatoes. Cover and cook until they are a bit tender and starting to brown a bit, about 5 minutes - it's o.k. to uncover to stir a couple times.

Stir in the garlic and onion and cook for another minute or two. Add the stock and the beans and bring the pot to a simmer. Stir in the cabbage and cook for a couple more minutes, until the cabbage softens up a bit.

Now adjust the seasoning - getting the seasoning right is important or your soup will taste flat and uninteresting. Taste and add more salt if needed, the amount of salt you will need to add will depend on how salty your stock is (varying widely between brands, homemade, etc). Continue to simmer until cabbage is tender. This is a judgment call - I like mine well done, others prefer a bit more firmness - you'll know

Serve drizzled with a bit of olive oil and a generous dusting of cheese.

Wednesday, January 20, 2010

Bacon Laced Cream of Celery Soup + Rethink the lowly holiday nut cracker


Celery soup isn't too complicated. And celery itself isn't all that flavorful. I wanted my soup to have a little more weight while still retaining a nice celery taste that's where the bacon comes in. Besides, I bacon

I know we all do it - buy celery for this reason or that and then those poor, left-over stalks sit in the fridge until they are all limp and slimy. About that time they make it into the trash for a proper burial. This recipe will give our neglected celery something to do and keep us from hitting ourselves over the head for wasting food - yet again.

I cooked the bacon in our soup pot, leaving the fat behind to sauté our celery and onion. Then I crumbled the cooked bacon on top at the end. It adds a nice, salty depth of flavor that I love, but of course if you are a vegetarian or just want a simpler soup, you could leave it out.

4 strips bacon
1 tablespoon butter
5 cups (loosely packed) chopped celery, stalks and tops
1 medium onion, chopped
2 cloves garlic, chopped
1 tablespoon fresh thyme
1 medium baking potato, peeled and cubed
2 cups vegetable or chicken stock
2 cups whole milk
salt and pepper

Lay the bacon in the bottom of a large stock pot or dutch oven. Cook over low heat for about 15 or 20 minutes, until crisp (cooking time will depend on how thick your bacon is). Remove and set aside on paper towels.

Add butter to the pot, increase the heat slightly, and add celery, onion, garlic, and thyme. Season well with salt and pepper. Cook, stirring occasionally, until vegetables are soft, about 15 minutes.

Add the potato, stock, and milk to the pot and bring the mixture to a simmer. Cover and cook for 30 minutes, stirring occasionally to keep the milk from forming a film, until potato is very soft.

Purée the soup with food processor or blender. Season to taste with salt and pepper. Serve with cooked bacon crumbled on top. YUM!


I found this little hint and thought - Why in the world didn't I think of that! I can't tell you how many times I've grabbed glue and couldn't get the cap off. I don't consider myself a wimp but there are times when I need a little help with opening and twisting! The dogs and cats don't have opposable thumbs so I am pretty much on my own  But, lookie-lookie, grab your nut cracker and you are off to the races gluing and smiling

Tuesday, January 19, 2010

♥Let's gift some dipped 'n sprinkled Valentine's Day Fortune Cookies♥


Who doesn’t love fortune cookies? I love fortune cookies. You love fortune cookies. Everyone loves fortune cookies. These little sweet treats are so fun and so easy. You are going to love them, almost as much as the people you bless them with on Valentine's Day! Next time my grandsons are here for a sleepover, I think we're gonna whip up a batch of these so they can have a homemade Valentine to give to their mom and dad. Great gifts for teachers, Sunday school, neighbors, hair dresser, mailman, paperboy - you name it!

These are SO EASY TO MAKE!

1. Purchase a box of fortune cookies, two large Symphony chocolate candy bars, and some sprinkles in various colors and tastes and fun shapes.
2. Slowly melt chocolate using a double boiler.
3. Dip your fortune cookies in melted chocolate. Generally, I will use tongs for this because I don't want to burn my fingers in the chocolate! Yeah - right - I'd have that stuff licked off my pinkie before you could whistle Dixie
4. Sprinkle! Be creative. Try using coconut, nuts, crushed peanut butter bars, whatever comes to mind that would be fun. Because, after all, you should have fun
5. Set dipped and sprinkled fortune cookies on parchment paper until dry.
6. Once dry, package your fortune cookies in small take out boxes or in a row of cellophane.
7. Add a tag and deliver. You may use the tag suggested here if you would like.


Monday, January 18, 2010

♥Unbelievable Penuche Pumpkin Bars♥


Penuche fudge, made from a mixture of butter, brown sugar and milk, is a regional treat often found in the New England area. In this bar, a layer of penuche fudge makes a tasty frosting-like topping for moist pumpkin bars. I'm so sorry if you decided to drop a couple of pounds this year but I had to share this recipe. With a nice cup of tea or coffee - these can't be beat! They just melt in your mouth☺

INGREDIENTS:

Bars:

1/2 cup (1 stick) butter
1 cup light brown sugar, packed
2 eggs
1 teaspoon pure vanilla extract
1 cup pumpkin purée
1 cup flour
1/2 teaspoon baking powder
1/8 teaspoon baking soda
1/4 teaspoon salt
1 teaspoon ground cinnamon
1/2 teaspoon ground ginger
1/4 teaspoon ground nutmeg
1 cup toasted nuts, chopped, optional

Fudge Frosting:

1/2 cup (1 stick) butter
1 cup light brown sugar, packed
1/4 cup whole milk or light cream
2 cups confectioners' sugar

DIRECTIONS:

Bars:

Preheat oven to 350°F. Lightly butter and flour a 13x9x2-inch pan.

In a large bowl, cream together butter and sugar using an electric mixer. Add eggs and vanilla extract, mix to combine. Add pumpkin; mix well.

In a medium bowl, combine flour, baking powder, baking soda, salt, cinnamon, ginger and nutmeg; mix to combine. Slowly add flour mixture to butter mixture; mix well. If desired, add nuts or raisins; mix until dispersed evenly.

Pour batter into prepared pan; spread evenly. Bake 20 to 25 minutes or until a toothpick inserted in center comes out clean. Allow bars to cool in pan before topping with fudge frosting.

Fudge Frosting:

Combine butter and brown sugar in a saucepan over medium-high heat; bring to a boil. Lower heat to medium low and continue to boil for 2 minutes, stirring constantly. Add milk and return to boil, stirring constantly. Transfer mixture to a medium bowl; cool to lukewarm.

Gradually add confectioners' sugar, stirring until incorporated. Beat mixture until thick enough to spread; adding additional confectioners' sugar, if needed. If fudge is too thick, add a little hot water.

Frost cooled bars with warm fudge; let fudge set completely before cutting into squares.

Store finished bars covered in the refrigerator for up to 3 days.

Sunday, January 17, 2010

☺You just have to smile when someone is smiling at you☺Crochet some Amigurumi ♥s

Amigurumi (編みぐるみ?, lit. knitted stuffed toy) is the Japanese art of knitting or crocheting small stuffed animals and anthropomorphic creatures. The word is derived from a combination of the Japanese words ami, meaning crocheted or knitted, and nuigurumi, meaning stuffed doll.[1] 

Amigurumi are typically animals, but can include artistic renderings, and inanimate objects endowed with anthropomorphic features.

Amigurumi are usually crocheted or knitted out of yarn. The simplest designs are worked in spirals. In contrast to typical Western crochet the rounds are not usually joined. They are also worked with a smaller size hook in proportion to the weight of the yarn in order to create a very tight-looking fabric without any gaps through which the stuffing mightescape. 


Amigurumi are usually worked in sections and then joined, except for some amigurumi which have no limbs, only a head and torso which are worked as one piece. The extremities are sometimes stuffed with plastic pellets to give them a life-like weight, while the rest of the body is stuffed with fiber stuffing.

The pervading aesthetic of amigurumi is cuteness. To this end, typical amigurumi animals have an over-sized spherical head on a cylindrical body with undersized extremities.


These little guys are so much fun to crochet and so much fun to give or to keep or to just look at as they smile right back at you! This is a very easy pattern so don't be shy! Make up a bunch while you are watching teevee and fill a basket for your table or give one with each of your Valentines or hang them with little ribbons from your curtains - use your imagination and have fun

Abbreviations:
Ch-chain
Sc-single crochet
Sc2tog-single crochet 2 together (decrease)
MM-Move stitch marker
FO-finish off or bind off
Materials:
Size F (3.75 mm) Crochet hook

Caron Simply Soft Brites or
Red Hear Soft Yarn is highly recommended
9mm doll eyes
Polyester stuffing material
Embroidery Needle
Finished Size:
Approx: 3” tall

Directions:
1st circle:
R1-Ch2, 6sc in 1st chain, mm
R2-2sc in each sc around (12sc) mm
R3-*2sc in first sc, 1sc in next, repeat from * around, mm (18sc)
R4-*2sc in first sc, 1sc in next 2sc, repeat from * around, (24sc)
FO First circle leaving a 6” tail
Set aside
2nd Circle:
R1-Ch2, 6sc in 1st chain, mm
R2-2sc in each sc around (12sc) mm
R3-*2sc in first sc, 1sc in next, repeat from * around, mm (18sc)
R4-*2sc in first sc, 1sc in next 2sc, repeat from * around, (24sc)
Do not finish off, remove your hook and get your first circle
Put both circles together, wrong sides in, using the tail from circle #1, whip stitch the two circles together using your yarn needle through 4 stitches. Your working loop should be on the outside of the circle and not stitched through.
When you are done, you will have a figure “8” shape.
Put you hook back into your working loop and continue to…
R5 thru 13-sc in each stitch around, mm (42sc)
R14-*sc2tog, 1sc in next 5 stitches*, repeat from * around, mm
R15-sc in each stitch around, mm
R16-*sc2tog, 1sc in next 4 stitches*, repeat from * around, mm
R17-sc in each stitch around, mm
R18-*sc2tog, 1sc in next 3 stitches*, repeat from * around, mm
R19-sc in each stitch around, mm
R20-*sc2tog, 1sc in next 2 stitches*, repeat from * around, mm
R21-sc in each stitch around, mm
Add eyes and begin stuffing, the more stuffing the better…don’t be shy with it. You want the finished hear to be firm to the touch.
R22-*sc2tog, 1sc in next stitch*, repeat from * around, mm
R23-sc in each stitch around, FO leaving a tail
Finish stuffing and use the tail to sew the hole shut tight.
With scrap black yarn, add a simple v-shaped smile!